HDR Composition
Instructions: click arrow to see HDR photograph of each slide
The composition of this photo is symmetry.
The composition of this photo is Frame.
The composition of this photo is Leading Line.
The composition of this photo is Crop.
The composition of this photo is Rule of Thirds.
All of these photo were taken with a tripod to be able to get a better result without the photos moving
Elliot Erwitt
MOON PHOTOGRAPH
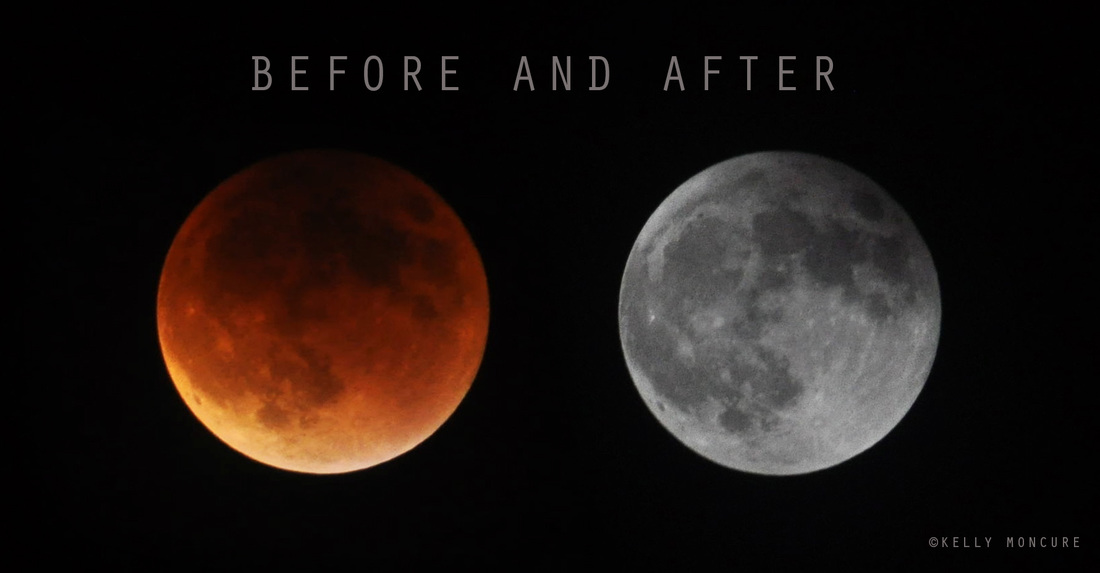
Blood Moon Lunar Eclipse, September 27, 2015. Left image: 70-300mm lens @ 270mm, ISO 1000, aperture f/5.3, shutter speed 1.3 secs. Right image: 70-300mm lens @ 300mm, ISO 800, aperture f/13, shutter speed 1/1250 sec.
To photograph the moon:
1. Use a tripod! A flat surface will only allow you to shoot straight, and shooting the moon means that you'll be shooting up and constantly re-adjusting the tripod as the moon moves throughout the night.
2. Use a shutter release cord, remote or the camera's self timer if you don't have one, so that you don't move the camera when pressing the shutter release during a long exposure.
3. Use a zoom lens and zoom in as much as you can to the moon. It's okay if it's not a super fancy lens, this was shot using a 15 year old $100 lens. Focus in on the craters and details on the moon.
4. ISO 1250- 1600, so that you can use as fast a shutter speed as you can without losing detail-the longer the shutter speed, the more chances you have the camera will shake even slightly in the wind, resulting in an out of focus photograph.
5. Aperture priority of f/5.6 since you are not worried about capturing any details other then the moon.
6. Bracket your exposure, meaning over expose and underexpose the photograph from what the camera is telling you. Generally the camera will overexpose the moon, so you'll get nothing but a white blob in the sky. Use the exposure compensation button (the +/- button below the shutter release) and change the exposure to -0.5, then -1.0, then -1.5 and so on, until you start seeing detail in the moon. You may go as far as -5.0 exposure compensation to get what you need.
7. Take a fair amount of photos and keep refocusing as the night progresses. The photographs may look focused on the camera's display, but you won't really see if they're completely in focus until you upload them onto your computer screen.
HALLOWEEN
Principles of Art
Aperture f/8 ISO 400 Shutter Speed 1/125
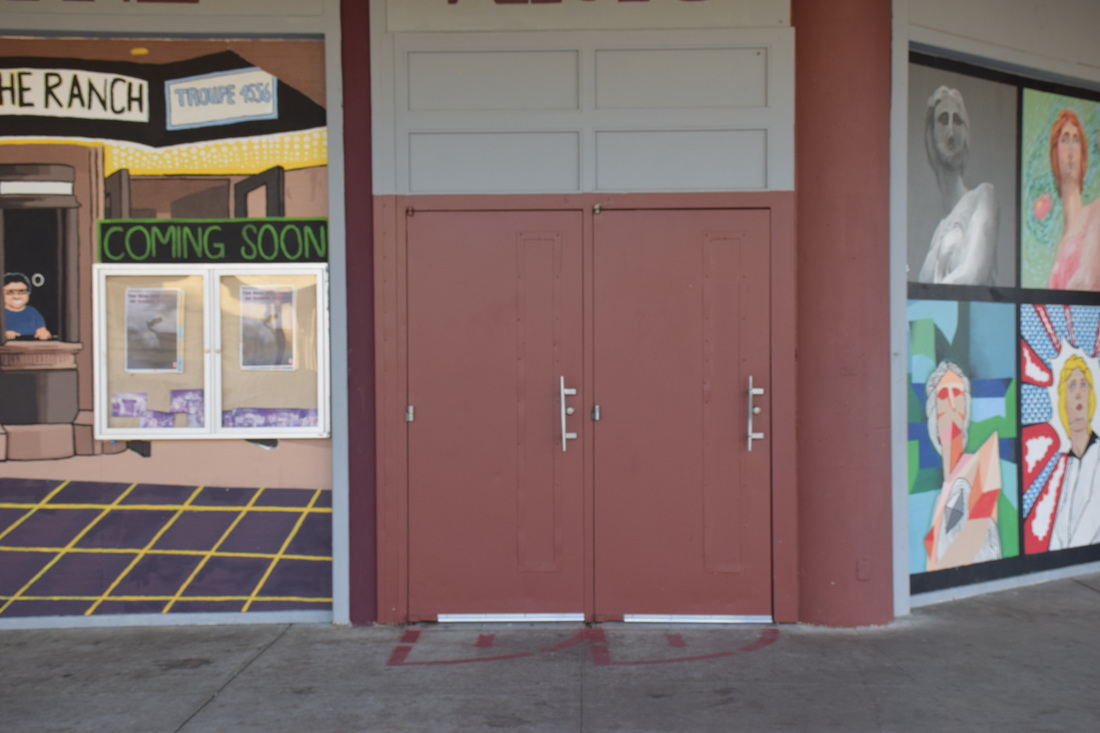
BALANCE
The main principle is of two doors that look the same which is symmetrical. The photograph came out to be successful because the door made a good match for the principle of art.
The main principle is of two doors that look the same which is symmetrical. The photograph came out to be successful because the door made a good match for the principle of art.
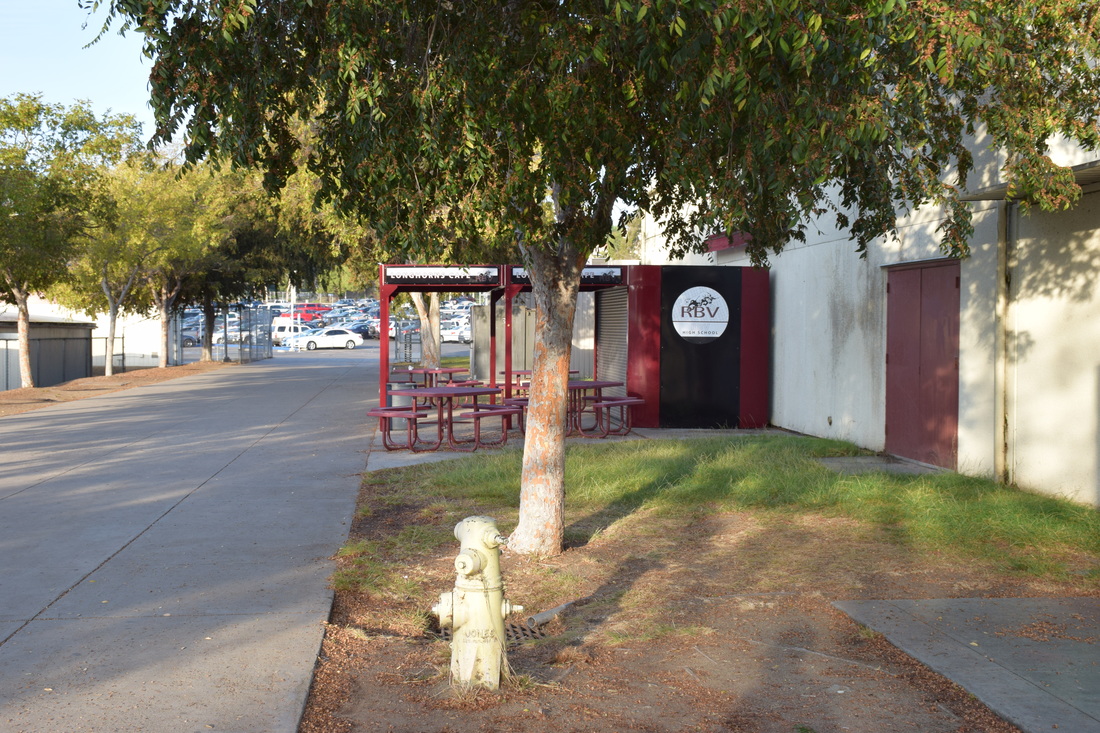
Aperture f/8 ISO 400 Shutter Speed
PROPORTION
The main principle is of the fire hydrant and tree which relates to the relative size, in which case it gives you an idea of the size of the tree. This photo came out successful because it was a perfect match for size.
The main principle is of the fire hydrant and tree which relates to the relative size, in which case it gives you an idea of the size of the tree. This photo came out successful because it was a perfect match for size.
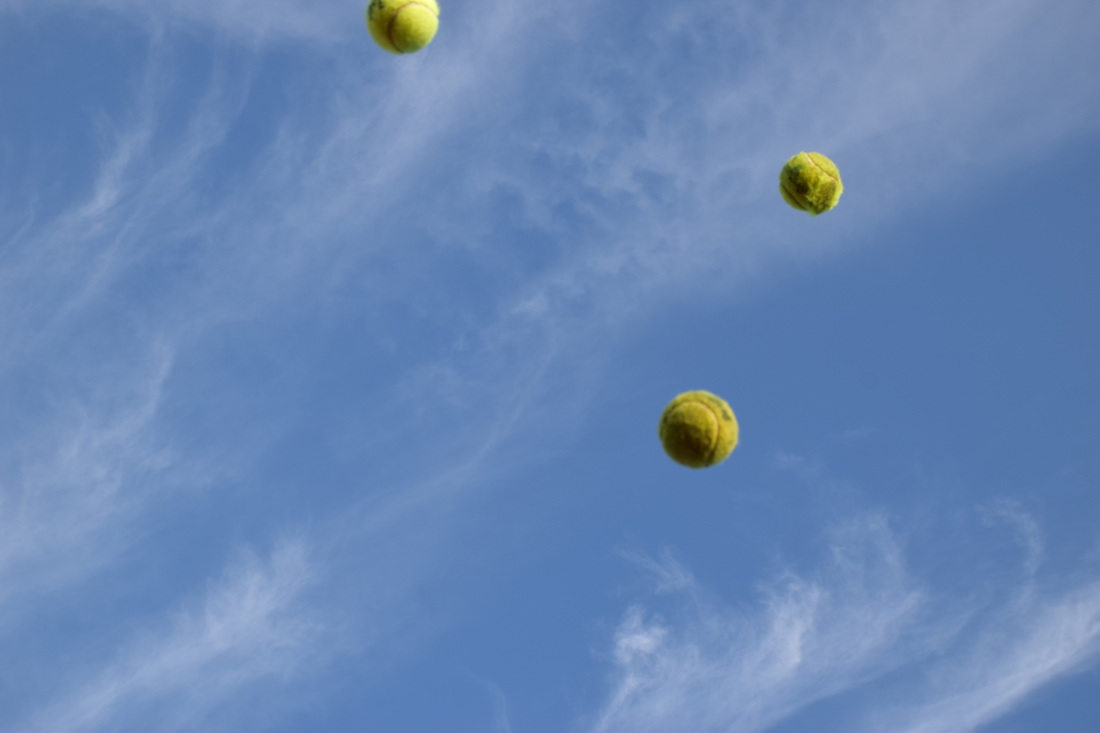
Aperture f/9.5 ISO 400 Shutter Speed 1/500
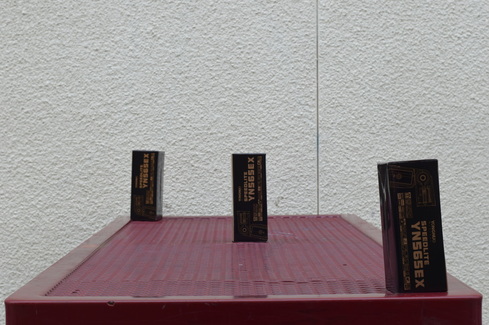
RHYTHM
The main principles in this photo are the 3 tennis balls which indicates that theres a repetition of movement and motion going on. The photo was successful because me and my partner found 3 balls laying down and with her help of throwing them in the air we became successful with the photo.
The main principles in this photo are the 3 tennis balls which indicates that theres a repetition of movement and motion going on. The photo was successful because me and my partner found 3 balls laying down and with her help of throwing them in the air we became successful with the photo.
Aperture f/9.5 ISO 400 Shutter Speed 1/180
EMPHASIS
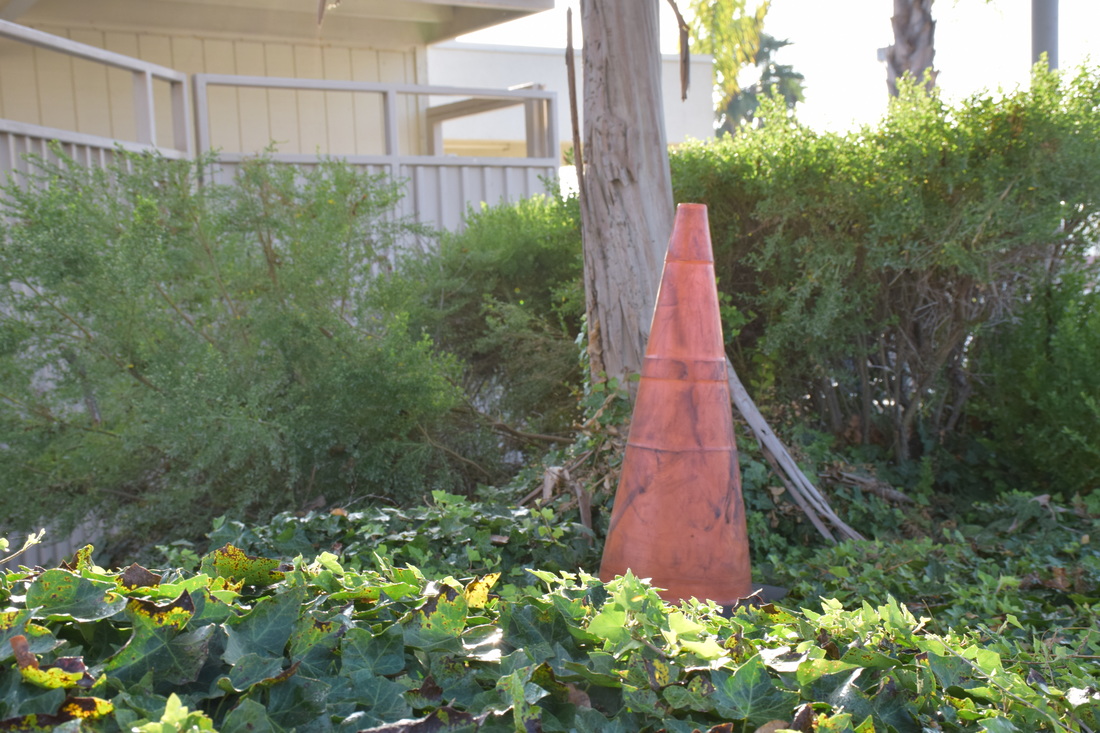
The main principle in this photo is suppose to be the bright orange cone and it shows how it will capture the viewers attention when they see a random cone. This photo came out successful because we found a cone and clean spot to take the picture.
The main principle in this photo is suppose to be the bright orange cone and it shows how it will capture the viewers attention when they see a random cone. This photo came out successful because we found a cone and clean spot to take the picture.
Aperture f/8 ISO 400 Shutter Speed 1/4,000
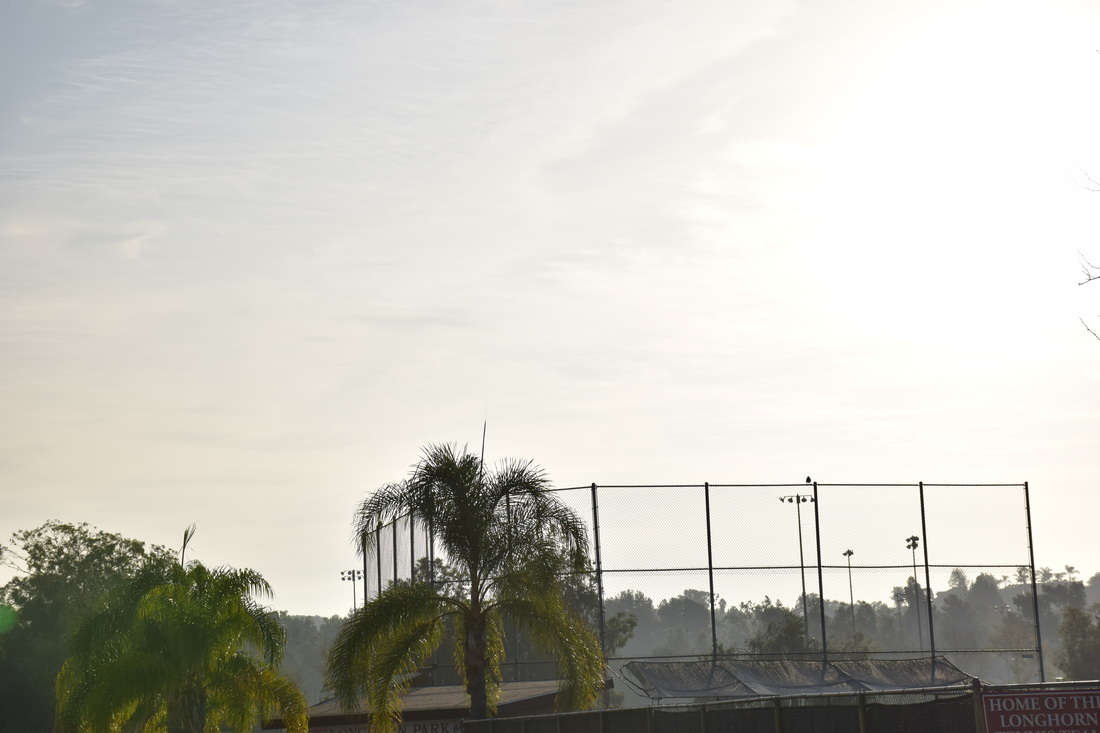
HARMONY
The main principle in the photograph is the everything within the photo because it brings a vibe of peace and harmony. This photo came successful because it was morning so it gave me a great help with the weather.
The main principle in the photograph is the everything within the photo because it brings a vibe of peace and harmony. This photo came successful because it was morning so it gave me a great help with the weather.
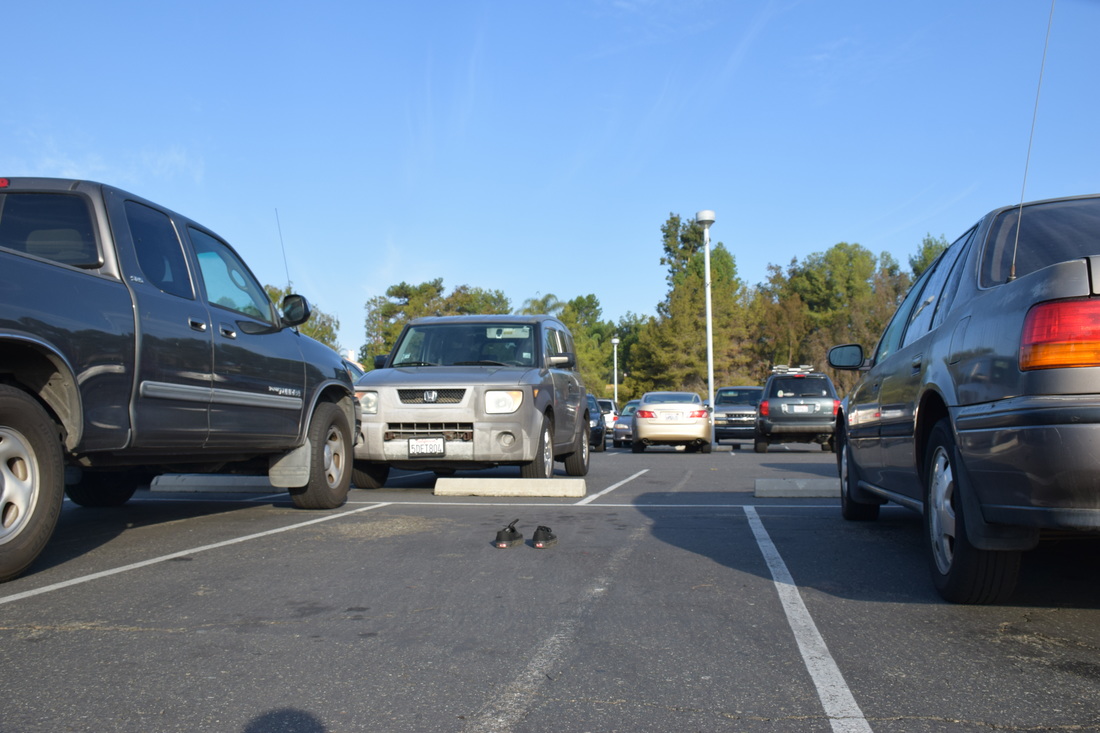
Aperture f/9.5 ISO 400 Shutter Speed 1/500
VARIETY
The main principle in this photograph is the black pair of shoes in the parking slot, it indicates a different type of photo with something rarely seen. This photo came out successful because we found an empty parking lot.
The main principle in this photograph is the black pair of shoes in the parking slot, it indicates a different type of photo with something rarely seen. This photo came out successful because we found an empty parking lot.
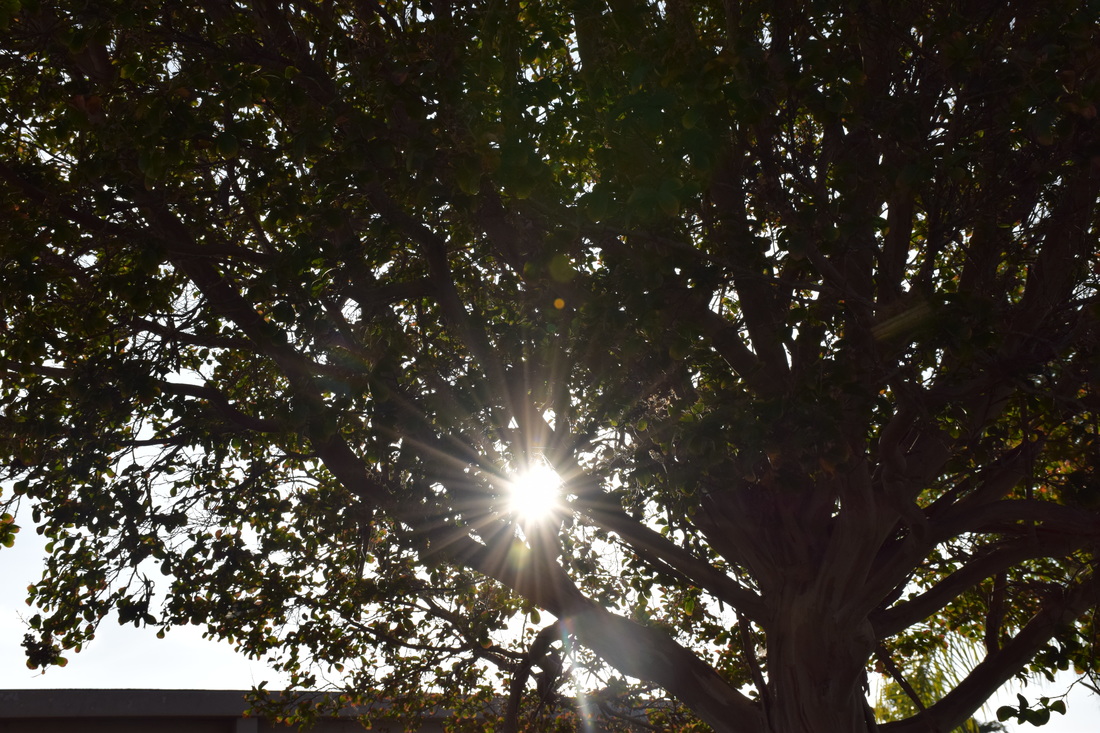
Aperture f/11 ISO 400 Shutter Speed 1/500
UNITY
The main principle in the photo I took was the sun because this photo became a combination of variety and unity, it sort of gives you a harmony feeling as well and catches your eye. This photo came out successful with the help of the weather.
The main principle in the photo I took was the sun because this photo became a combination of variety and unity, it sort of gives you a harmony feeling as well and catches your eye. This photo came out successful with the help of the weather.
Elements of Art
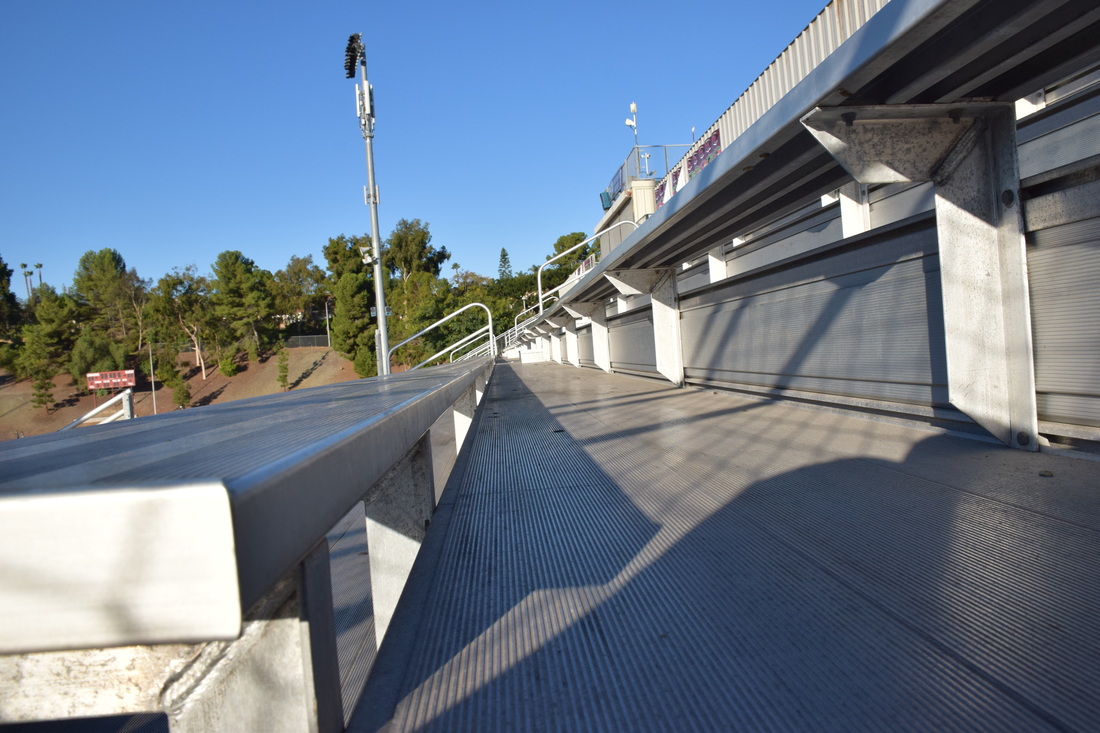
Aperture f/13 ISO 500 Shutter Speed 1/750
This is of an element of LINE. The main focus in this picture is the lines on the bleachers, Each set has lines going across. I feel like this photo was successful because it shows lines.
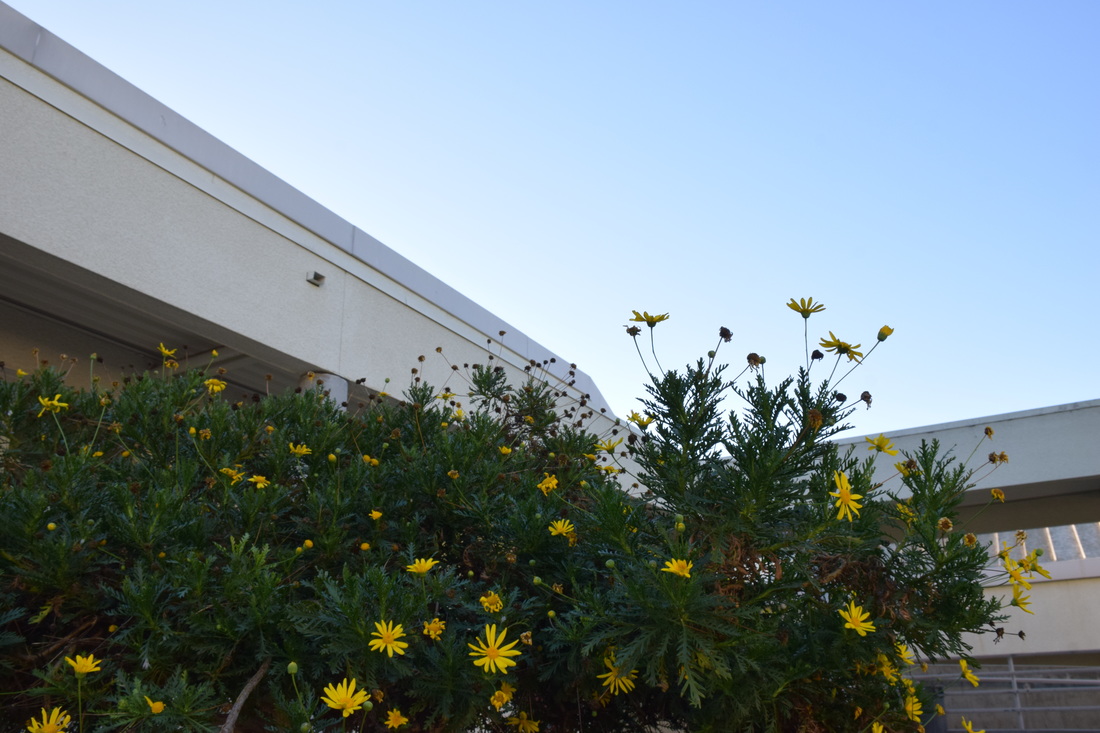
Aperture f/13 ISO 500 Shutter Speed 1/125
This is an element of COLOR. I believe it is that element because it shows how the plants are green, just one color while the main focus comes out the yellow flowers. This is successful because your eyes get focused onto the flowers.

Aperture f/13 ISO 500 Shutter Speed 1/60
The element in this picture is of SHAPE. I believe this is the element because it shows the way the water makes this sort of shape. It came out to be successful because it gives our eyes the attention on the water drops and circles in the hole.
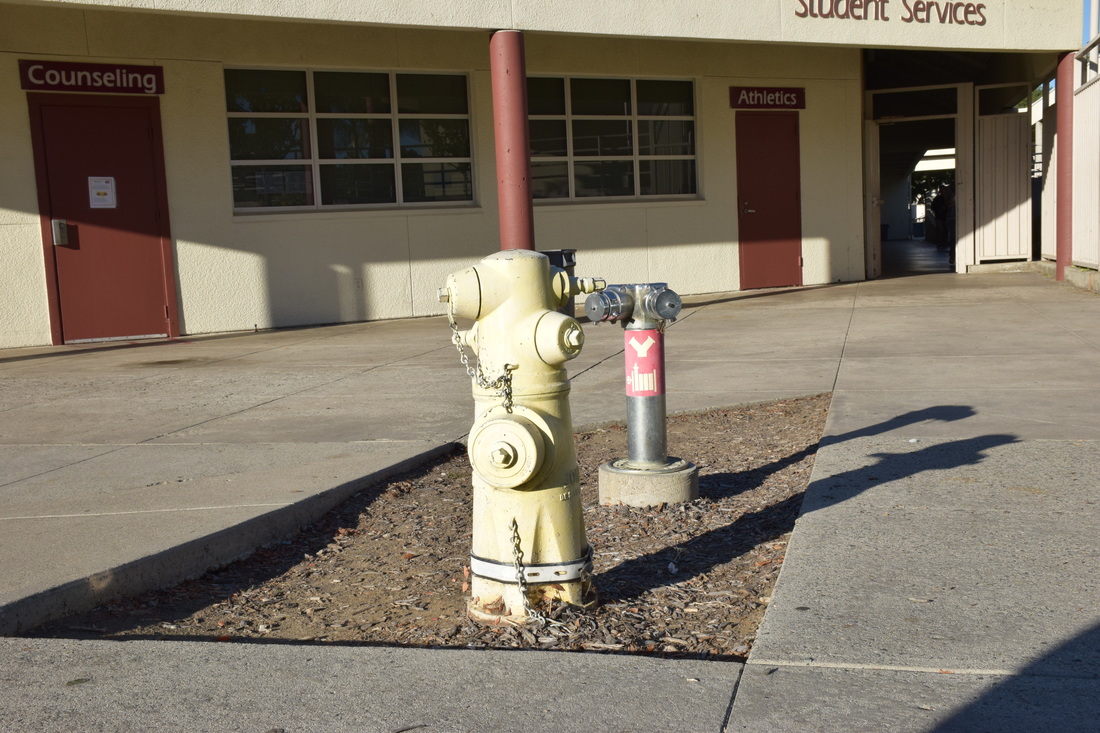
Aperture f/16 ISO 500 Shutter Speed 1/500
This is the element of FORM in art because in the picture it gives kind of 3D feeling. How you are able to see its shadow so you get a sort of sense of the shape and size. It was successful because I was able to get two of the fire hydrants so it helps define the size.
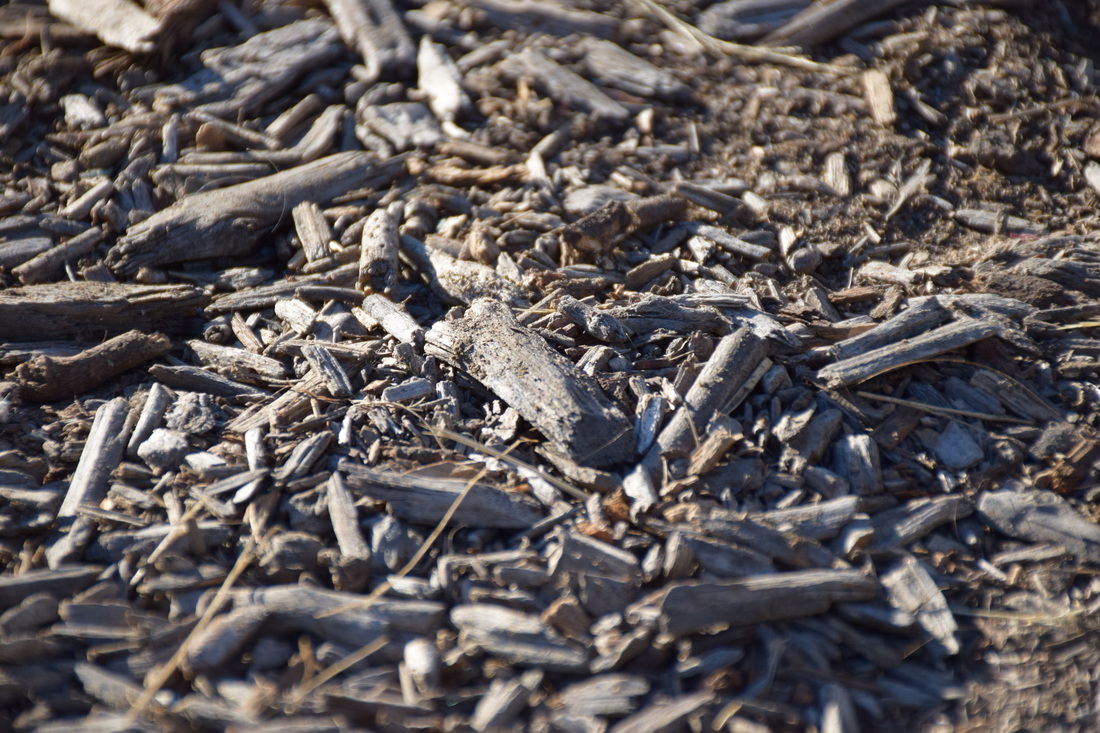
Aperture f/6.7 ISO 500 Shutter Speed 1/1,000
This is a photo of an element of LINE. The element in the picture is the pieces of wood. I believe that the photograph came out successful because it can be seen as texture, you get the sort of sense that you can feel it.

Aperture f/4.8 ISO 500 Shutter Speed 1/1,000
This is an element of SPACE in art. I believe it is shown here because you are able to see a little green plant and if you look around it it becomes all empty. This became successful because you are able to depict the element by the emptiness.
Aperture f/22 ISO 500 Shutter Speed 1/15
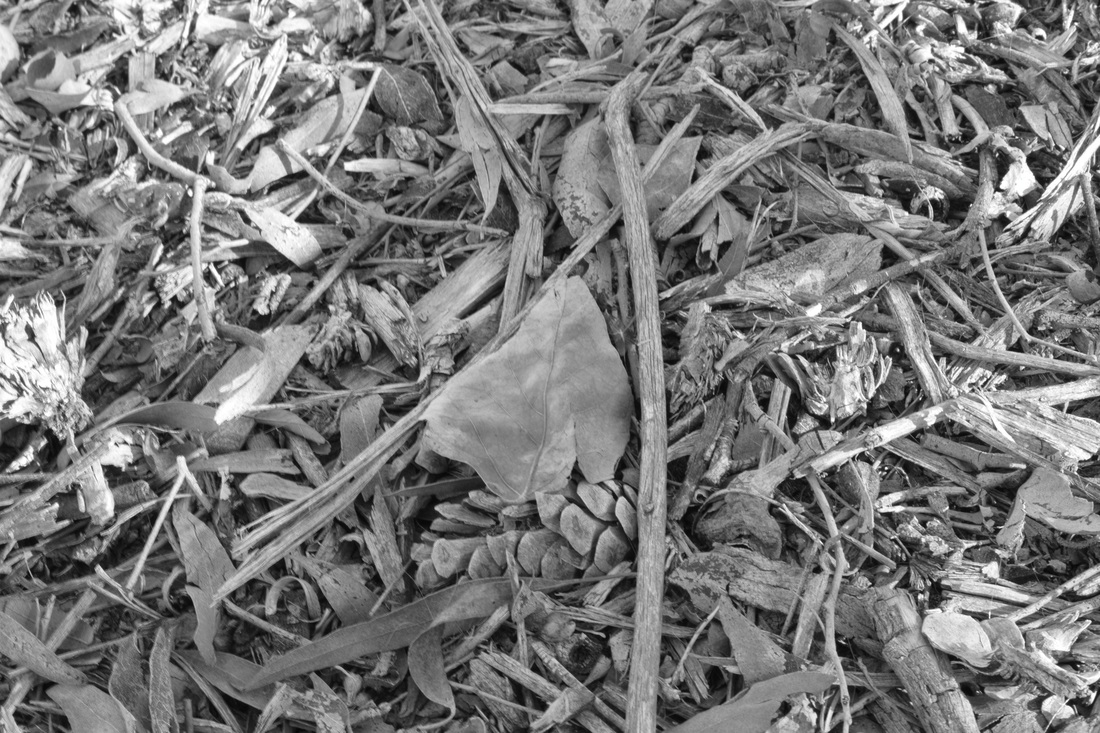
This is an element of VALUE because you can see the dark spots within the leaf. I think it became successful due to the help of the filter black and white which helps you depict the dark spots.
The Elements and Principles of Photography
ELEMENTS OF ART
- The “building block” of design.
- All good design will have one or more of these elements. Line. shape, form, texture, space, value
- This presentation aims to show you some illustrations of these elements through photography. It could also be done through other art methods
LINE-( Alfred Stieglitz, The Steerage)
- A line is a one dimensional and it vary in width, directions, and length. Lines also can define the edges of a form.
- Lines lead your eye around the composition.
COLOR (Sandy Skoglund, Revenge of the Goldfish, 1908)
- Color has these 3 main characteristics HUE (red, yellow, green) VALUE (how light or dark it is) INTENSITY (how bright or dull it is)
SHAPE (Laszlo Moholy-Nagy, Photogram, 1924)
- Shape is two dimensional with height and width
- Organic shape is made of nature. Not completely defined
- Inorganic shape is manmade, such as triangles and rectangles/
FORM (Ansel Adams, Mount Williamson-Clearing Storm,1944)
- Form is 3 dimensional, has heights and width and depth.
- Photographers emphasize form by the use of highlights and shadow
TEXTURE (Kelly Clark, Tiger Cat!, 2005)
- The surface quality of an object that we sense through touch. All objects have a physical texture. Such as horses hair
- In a two dimensional work, texture gives visual sense of how an object depicted would feel in real life if touched.
SPACE (Josef Koudelka, Czechoslovakia, 1968)
- Real space is 3 dimensional. Space in a work of art refers to a feeling of depth or three dimensions.
- Positive space is occupied by the primary object
- Negative space is the space around the primary object.
VALUE (Ben Von Wong, Redemption, 2012)
- Value is the lightness or darkness of a surface. It is frequently used when talking about shading. But it is also important in the study of color.
PRINCIPLES OF ART
- The principles of art are the rules or guidelines of art
- Used to organize or arrange the structural elements of design.
- Principles are
BALANCE (Annie Leibovitz)
- Balance is similar to our physical sense of balance. It is how the artist uses opposing forces in a composition that results in visual stability
- Most successful
PROPORTION (Diane Arbus)
- Relates to the relative size and scale of various elements in a design specifically, the relationship between the objects.
RHYTHM (Robert Capa)
- Rhythm in an artwork indicates movement by the repetition of elements. Rhythm can make an artwork seems active.
EMPHASIS (Steve McCurry)
- Is to make one part of an artwork dominant over the other parts. It attracts the viewer’s eyes to a place of special importance in artwork.
HARMONY (Joel Meyerowitz)
- Is pleasing and relaxing,
VARIETY (William Wegman)
- Differences achieved by opposing, contrasting, changing, elaborating, or diversifying elements in a composition to add individualism and interest. Unusual
UNITY (Mary Ellen Mark)
- Unity is the result bringing the elements of art into the appropriate ratio between harmony and variety to achieve a sense of oneness. It is the sense that everything works together and fits.
Fast Shutter Speed
1. I took the photos on ISO 1600 kept it at that for a couple of photos. I kept changing the aperture by just a little bit 4-8. My shutter speed I kept the same at 1/640
2. The struggles that I had were me not being able to react quick enough to take the picture and capture the moment but I solve this problem by taking a picture like a second before it happened.
3. First thing I learned was at what shutter speed to keep it at. Second thing I learned was to capture the picture before it happens because it moves too fast. Last thing i learned was how people capture moments that go by fast such as when they captured the famous runner Bolt.
4. Other things you can use shutter speed is for events that happen so fast that a regular phone cannot capture, things that go 200mph.
Respect Yourself
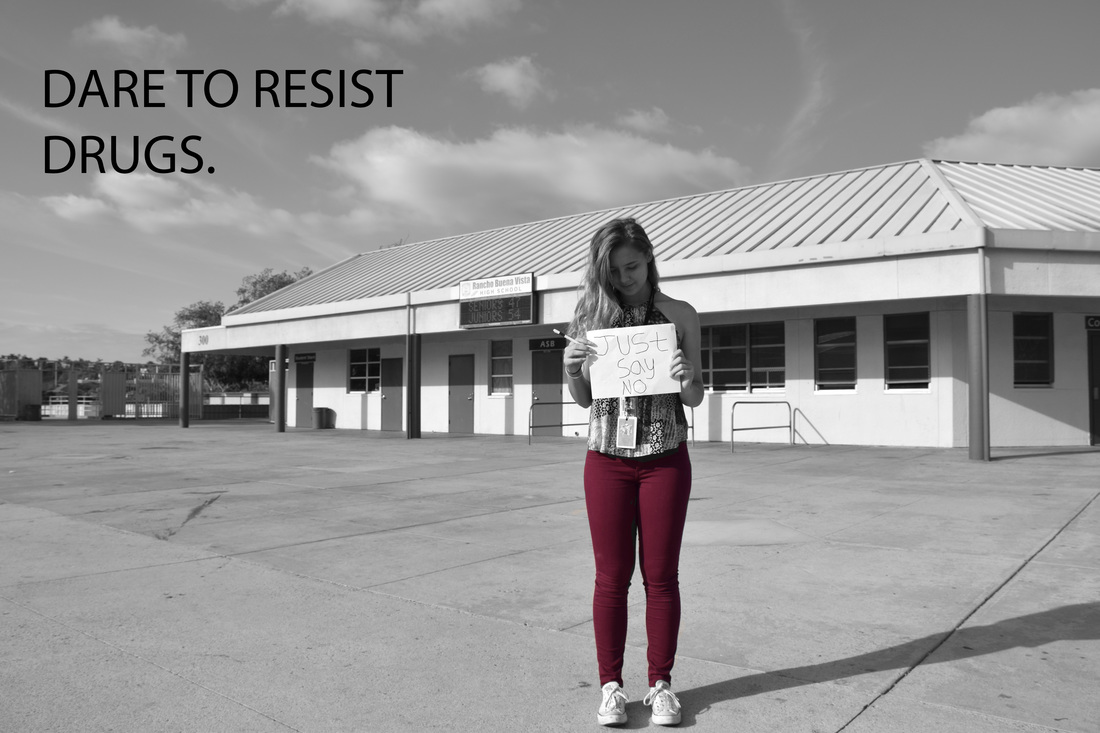
Do you have the awareness to respect yourself? Well the idea that I try to convey through the photo I took is being awake about the bad decisions that you can make. You don’t have to be lead into peer pressure. We have all at least once in our life have had the experience of being peer pressured into something we didn’t want to do, many teenagers are peer pressured into doing so. It portrays the idea that it is so easy for teens to be given drugs due to the peer pressure so they just in fact say yes. This I believe puts them in an endless cycle where they just can’t control their own decisions so they let others do it for them. Leading into the major factor on why kids are involved with drugs.
Therefore Red Ribbon Week became the prevention awareness campaign against the use of alcohol, tobacco, and other drugs. The red became to symbolize awareness. This was used In my photo to portray my idea. With the help of my partner Maddie to be the model of my photograph. She is holding a sign that reads “Just Say No” meaning that teens that are being asked or made to take drugs should just say no and not let somebody else decide for them. Right next to her is a caption that is asking the audience if they can make their own decisions basically, if they are able to resist drugs and have awareness not only that but most importantly respect themselves.
Therefore Red Ribbon Week became the prevention awareness campaign against the use of alcohol, tobacco, and other drugs. The red became to symbolize awareness. This was used In my photo to portray my idea. With the help of my partner Maddie to be the model of my photograph. She is holding a sign that reads “Just Say No” meaning that teens that are being asked or made to take drugs should just say no and not let somebody else decide for them. Right next to her is a caption that is asking the audience if they can make their own decisions basically, if they are able to resist drugs and have awareness not only that but most importantly respect themselves.
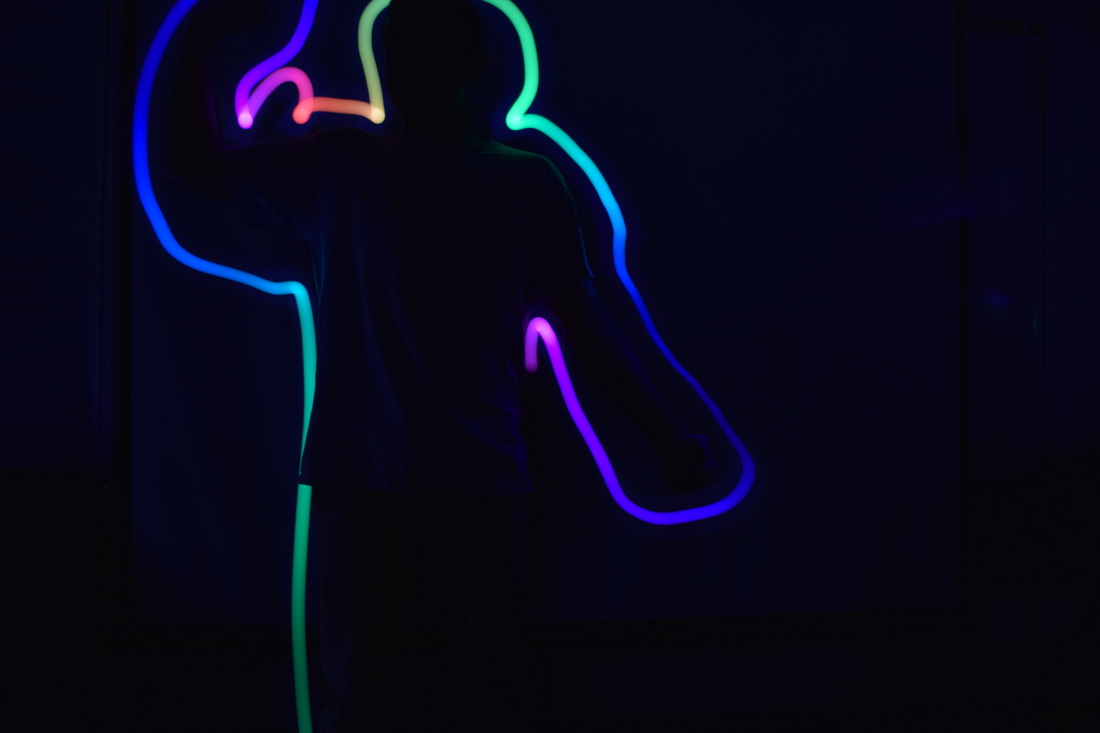
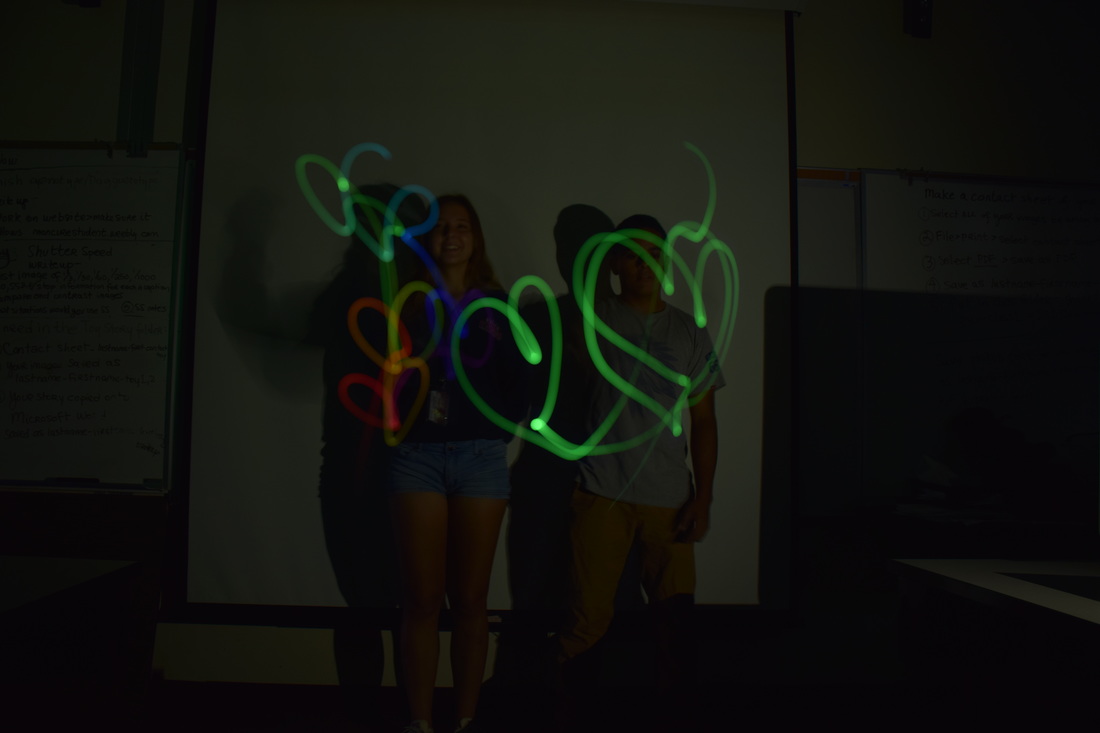
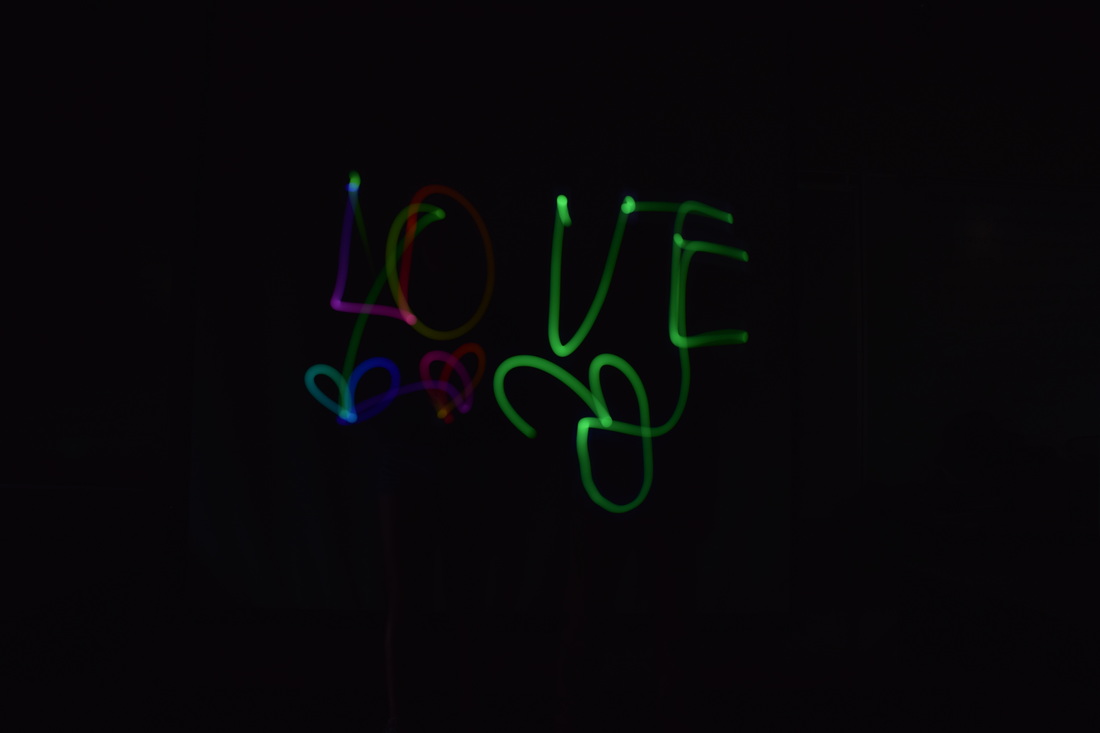
Light Painting
ISO 100 f/5.6 8.0
ISO 100 f/5.6 8.0
ISO 100 f/5.6 8.0
ISO 100 f/5.6 8.0
ISO 100 f/5.6 8.0

ISO 100 f/5.6 8.0
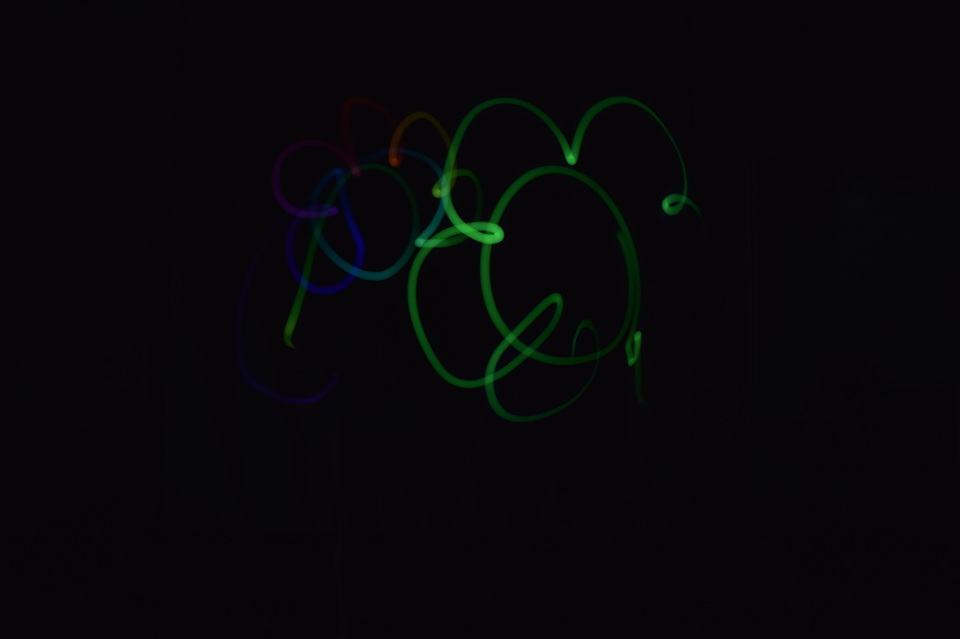
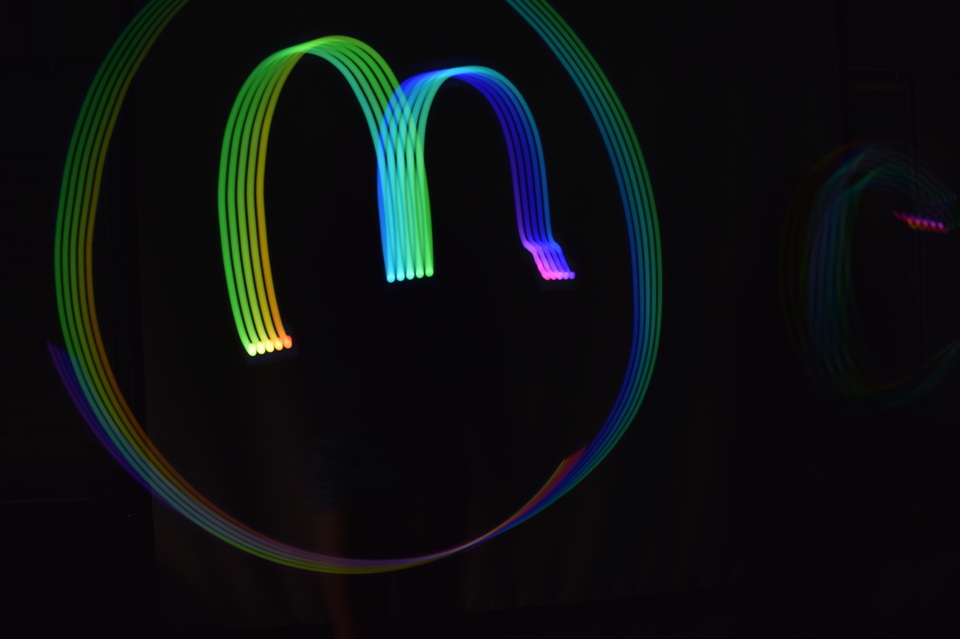
1. HOW you took them- on a tripod, in a dark room, in Manual mode with manual focus, what you had your partner do, what specific cell phone apps that you used, glowsticks etc.
The pictures were taken in a really dark room with the help of two people. Also to get the best out of our picture to be precise we used tripods. The materials that we used were a cellphone for the light and camera.
2. Any struggles you had with the light painting
The only struggle that We faced was the light at first was not showing up.
3. What you learned from light painting- the most important three things
I learned how light painting is done. Second thing I learned was how if you do it with the lights on it will not show.
Last thing I learned was how to work the camera for this activity.
4. What other ideas you could do with light paintings
Cool things that could have been with the help of a partner because it shows more lights and more action.
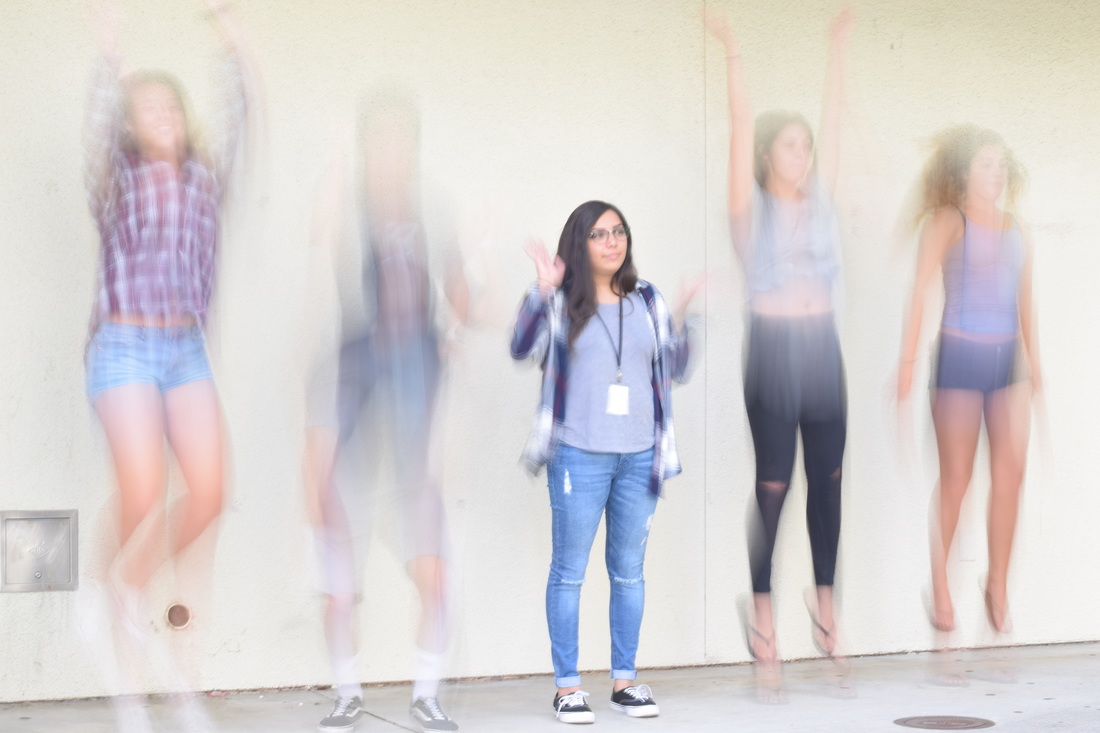
Shutter Speed Exercise
ISO f/16 1/3
Slower shutter speed can help convey the idea of motion and movement.
ISO f/9 1/30
Its capturing the movement that is moving but gets the object that isn't.
ISO 100 f/5.6 1/60
You can tell it is getting some movement due to the shutter speed.
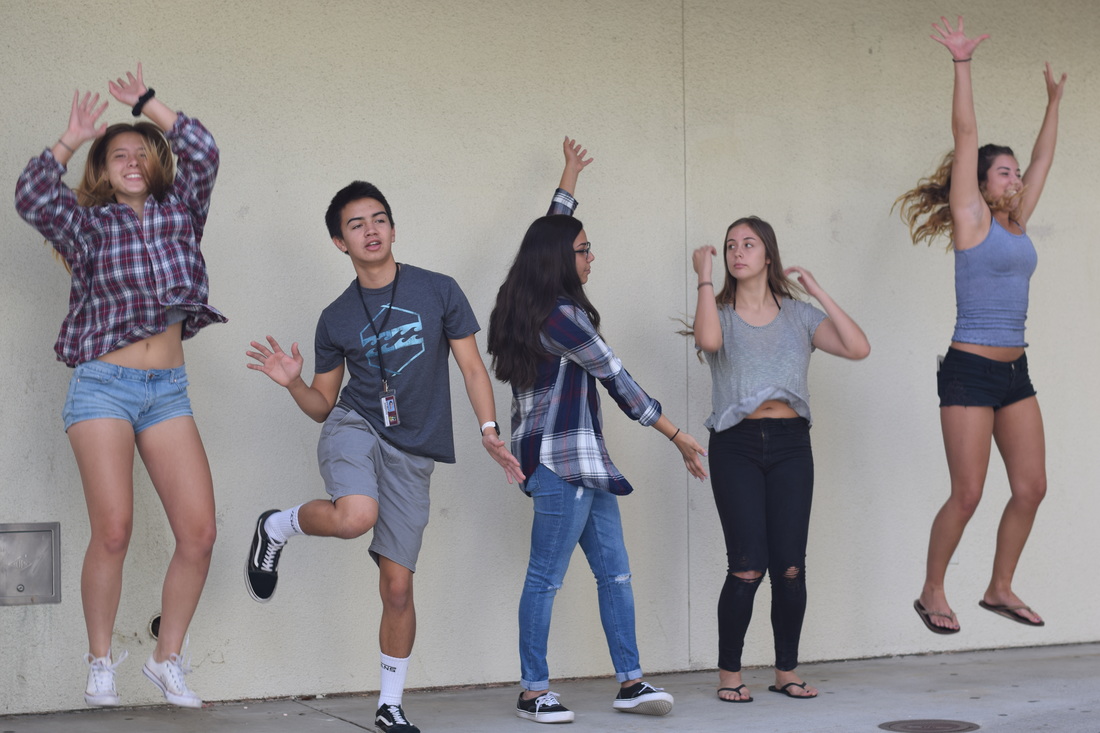
ISO 100 f/3.2 1/250
Its close to having to freeze that motion
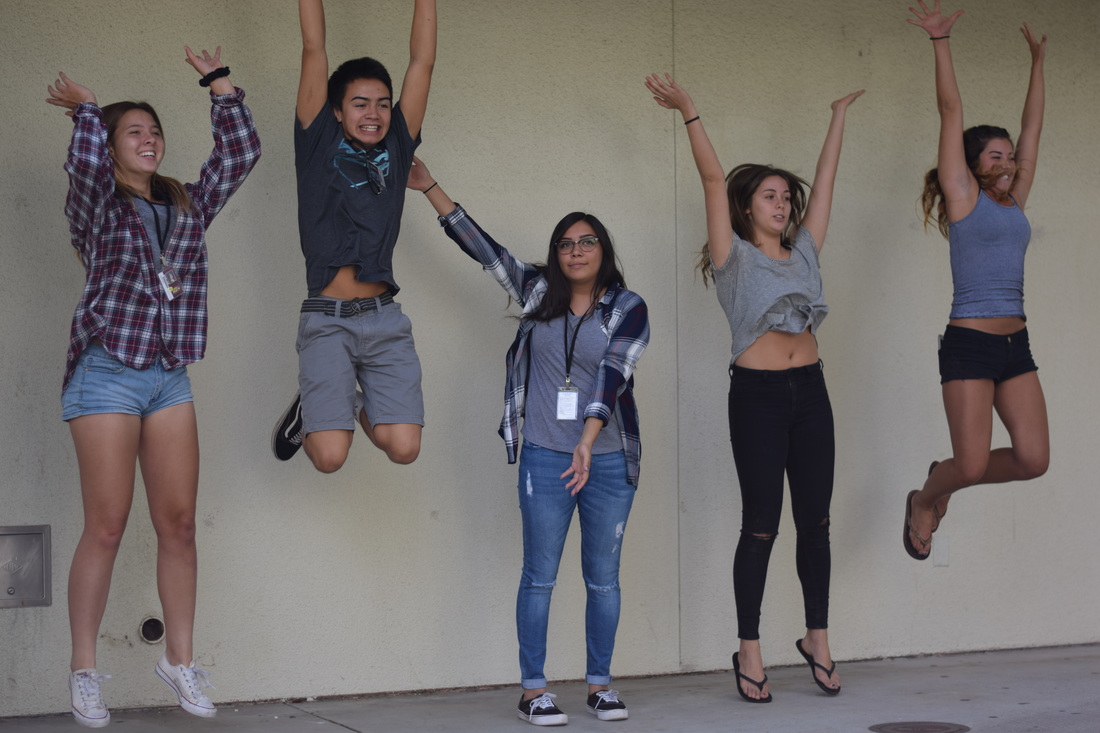
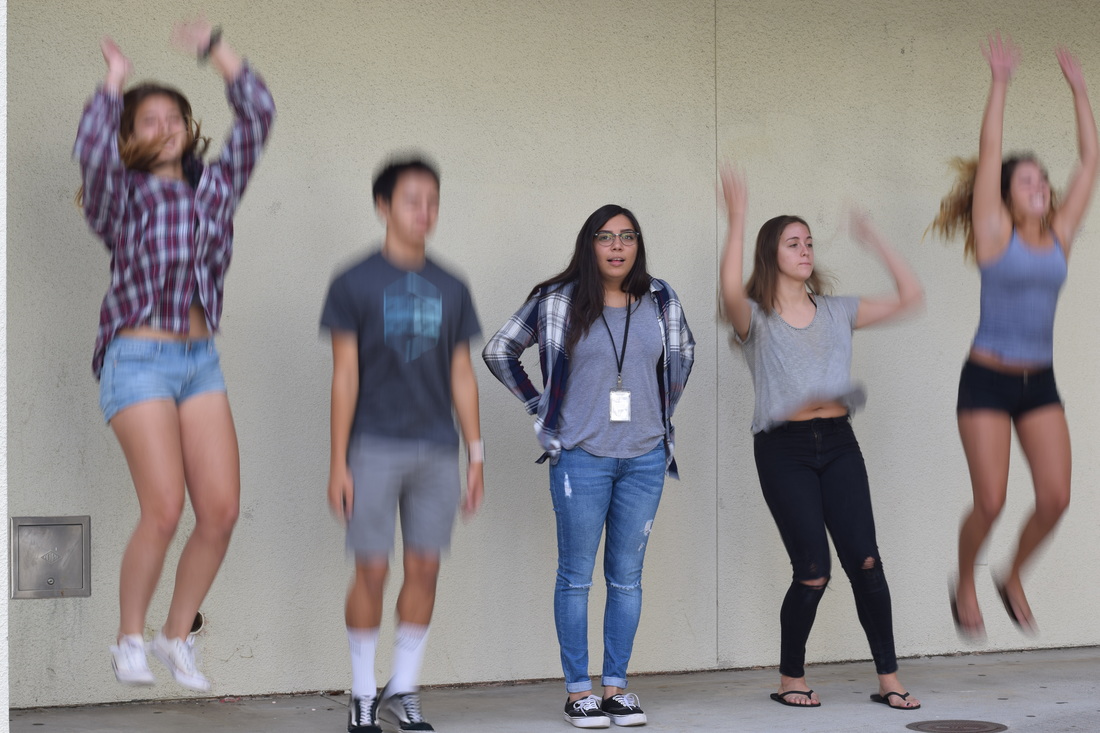
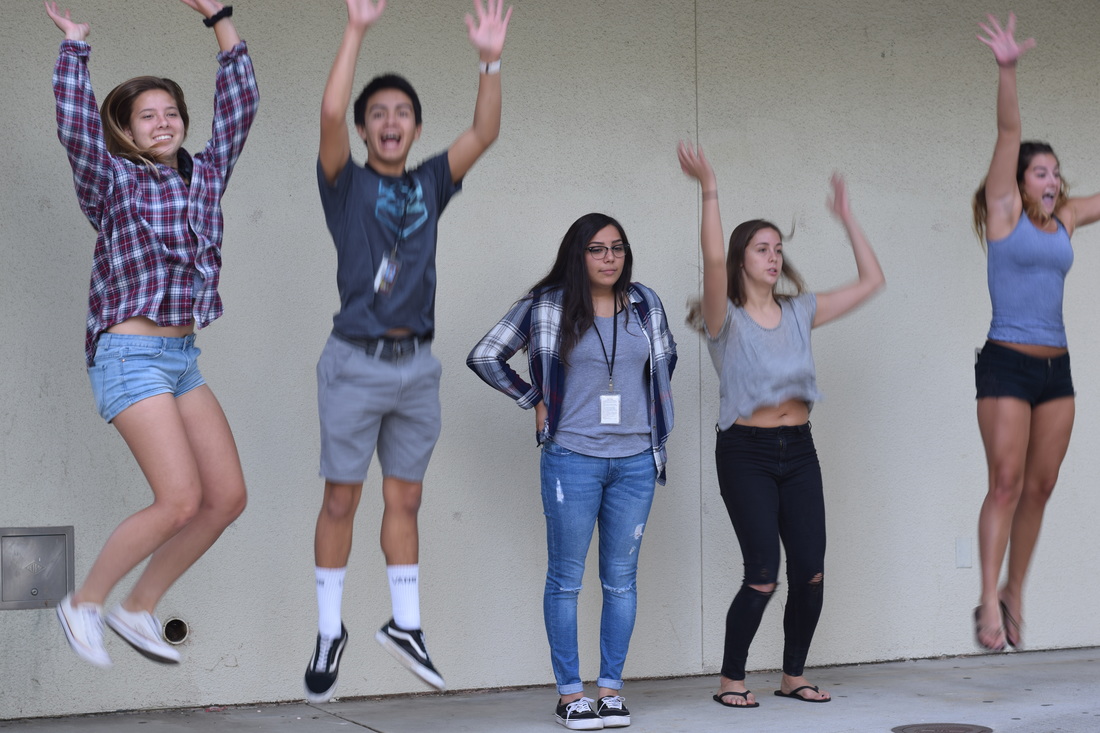
ISO 100 f/1.8 1/1,000
When photographing people jumping relatively close to the camera a shutter speed of 1/1000 second or faster should freeze most motions.
SHUTTER SPEED NOTES
- Shutter Speed: is both a technical and aesthic choice a photographer needs to make before releasing the shutter.
- Shutter inside your camera controls the duration of time the sensor is exposed to light.
- Capturing blur or motion in your photograph can emphasize movement and add drama.
- A fast shutter speed is often utilized to freeze the movement of a subject.
- A slower shutter speed can be used to show motion and visualize movement.
- Shutter speeds are expressed as seconds or fraction second.
- Avoid handholding shutter speed lower than 1/400
- Use tripod for less shaking of image
- The visual blur and suggestion of movement occurs because the subject is moving against a static background.
- Layering motion of different subjects moving different directions at different speeds can set up interesting dynamics within photographs.
- Fast shutter speed can make normal subjects appear to freeze in the air. 1/800
- When photographing people running relatively close to the camera a shutter speed of 1/1000 second or faster should freeze most motions.
- The distance the subject is from the camera, the speed of the subject. And the local length of lens will affect whether the subject is harp or blurred.
- Slower shutter speed can help convey the idea of motion and movement.
- Slow shutter speeds combined with panning can help isolate the subject from a busy and distracting background.
- A tripod combined with a long exposure can capture the fireworks’ trails.
- Water movement can be emphasized with long exposures.
Daguerrotypes and Cyanotypes
|
Cyanotypes:
a. Inventor and when it was first discovered. The inventor of the cyanotype was John Herschel in 1842 b. What chemicals are used in a cyanotype? 2 main chemicals used for the cyanotype are Potassium Ferricyanide and Ferric Ammonium Citrate blended together with water. C. Step by step of what you did to create a cyanotype 1. started at the station where you use the chemicals to put on the paper 2. after you have applied the chemical you dry it. 3. next you will have to go dry it for about 10 to 12 for good results. d. Image of your cyanotype(s) 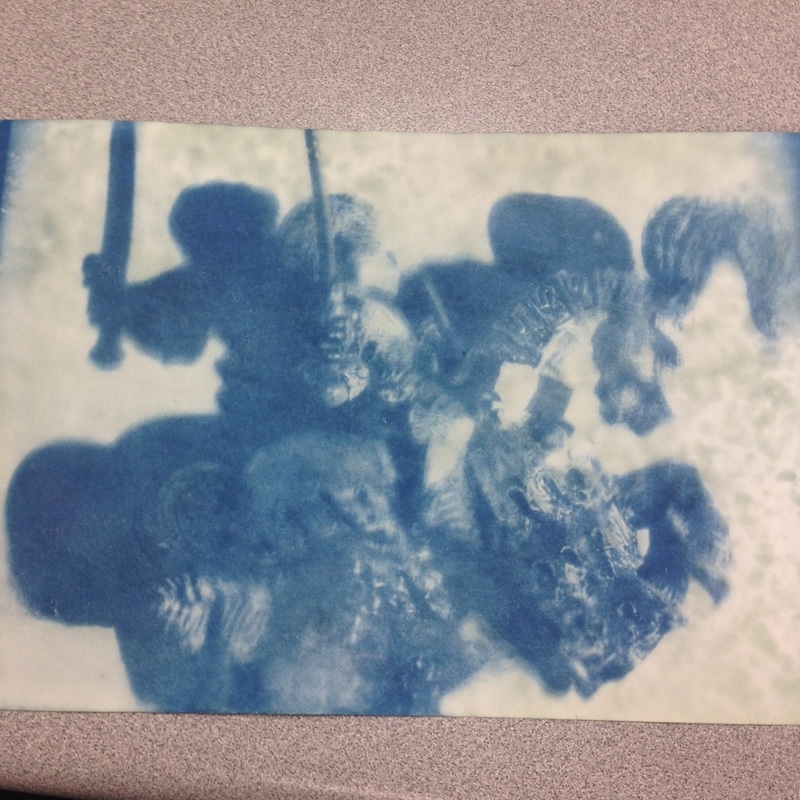
|
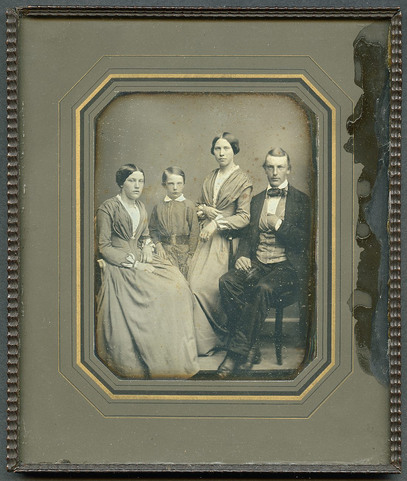
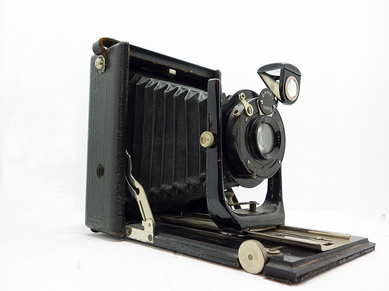
Daguerrotypes:
a. Inventor and when it was discovered. The Daguerrotype was invented by name of Louis-Jaques-Mandé in 1839. b. What goes into the process- what kind of chemicals are used? Any specific equipment? What is a daguerrotype exactly? starts with a silver-plated copper plate. The plate is first buffed and polished until it looks like a mirror. Then the plate is sensitized to light over iodine and bromine in specialized boxes. c. Image of a Daguerrotype- either from the web or take an image of the one shown in class. |
Toy Story
"Viva las Vegas"
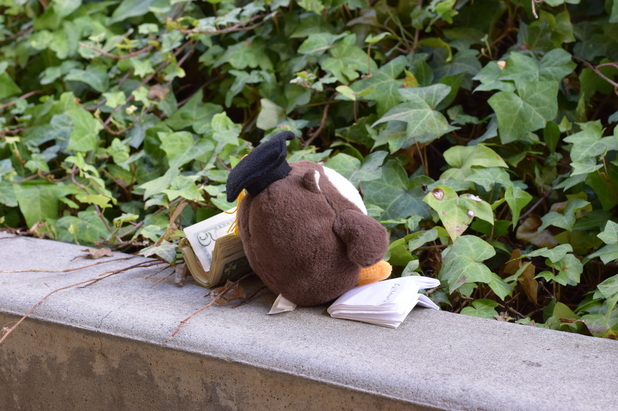
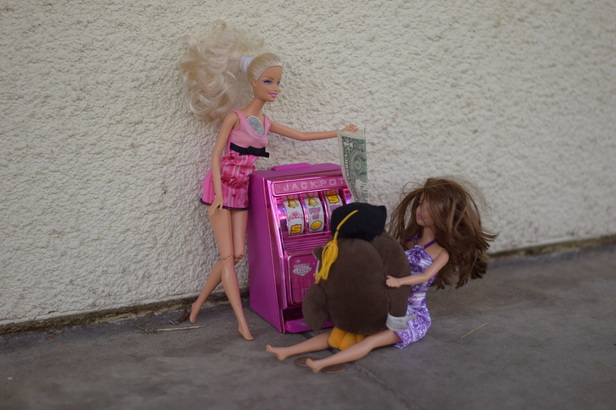
 "Small loan of a million dollars" ISO 400 f/8 1/125
Momma bear and son owl are giving their last goodbyes as Steve the son owl heads out to college for a new way of life. Momma bear doesn’t let her son leave empty handed. She gives him a small loan of a million dollars so that it can cover all the expenses and feel like at home from very far away. But Momma bear told him very specifically to not over spend it or else it would be very bad for him and may even end poor.
 "Work hard" ISO 400 f/1.8 1/1,000
Then you see Steve studying really hard in college, really stressed about all the work he has to do. Slowly starts to realize that it is too much work for him and then just decides to do something different.
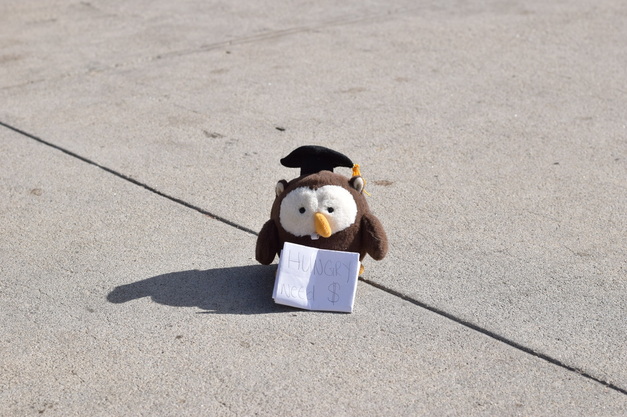
 "school is for losers" ISO 400 f/8 1/45
He figures that he is really stressed Later Steve figures that he should take a little vacation with his million dollars. So he decides to step on the books and go for his little vacation trip to a great place where he can make a good use of those one million dollars.
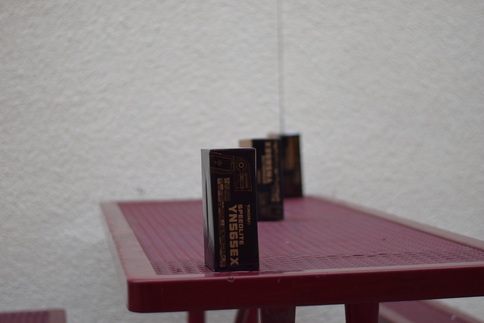
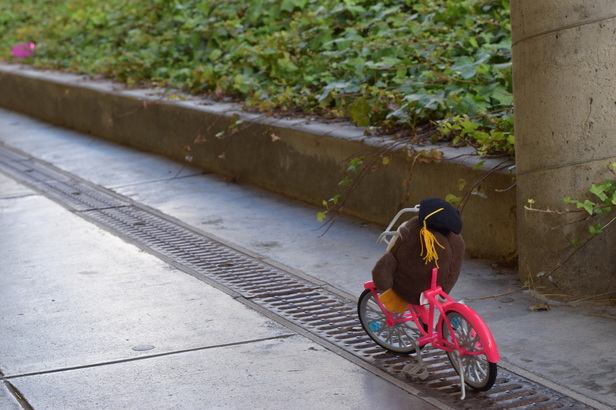 "OMW to Vegas" ISO 400 f/8 1/125
As he is on his way to Las Vegas on his little pink bike he starts thinking about what the will do with all that money. What could go wrong with a handsome owl with 1 million in his pocket and a cute pink bike? He says he won’t spend it all but anything can happen he says to himself.
 "Horseplay" ISO 400 f/1.8 1/2,000
Now he has finally arrived at his destination. Where he finds two good looking girls for his taste, whom he takes to expensive dinners and fun games. But Steve is not measuring his money wisely. What else could happen at Las Vegas with that kind of money?
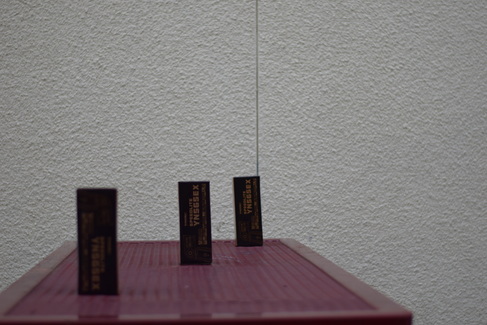
 "what happens in Vegas, stays in Vegas" ISO 400 f/8 1/1,500
After then he starts realizing that he has no money or his two girls left with him. No cash at all. That money he had for college is all gone now. Who is to blame we ask. Momma Bear’s fault or Steve? But he has learned his lesson
Aperture Priority
Aperture f/1.8, Shutter Speed 1/2000th of a second, ISO 200
Aperture f/8, Shutter Speed 1/100th of a second, ISO 100
Aperture f/16, Shutter Speed 1/25th of a second, ISO 200
What I learned about this was the way that every different Aperture changed the focus on the objects of which you are taking a photo of. For example the smaller the aperture the smaller the measurement of the distance of the object would be. Such as if it was bigger than the distance or measurement of the object it became bigger so you can focus on more objects if closer.
Lectures on digital camera basics
CAMERA
-DSLR stands for “Digital Single Lens Reflect”
EXPOSURE
- Exposure is the amount of light collected by the sensor in your camera during a single picture.
-Almost all cameras from today have light meters which measures how much light is given
- 3 primary controls that control the exposure are aperture, shutter speed, and ISO.
APERTURE- simply the hole at which the light travels into the camera body.
SHUTTER SPEED
M- when depth of field is important/manual control over aperture and shutter
A- aperture priority/
S- shutter priority
P- camera sets shutter speed and aperture
-DSLR stands for “Digital Single Lens Reflect”
EXPOSURE
- Exposure is the amount of light collected by the sensor in your camera during a single picture.
-Almost all cameras from today have light meters which measures how much light is given
- 3 primary controls that control the exposure are aperture, shutter speed, and ISO.
APERTURE- simply the hole at which the light travels into the camera body.
- Aperture is measured in f-numbers such as if it becomes smaller than that means it will give a large aperture.
- Large aperture soften background detail and smaller aperture gives the main subject and background into focus.
- Depth of Field (DOF) is the distance between the object and camera
SHUTTER SPEED
- Shutter speed stands for the length of time at which it takes the light to be taken
- The slowest shutter speed for handheld photography is 1/60. Anything lower than that should be either on a tripod or solid surface.
- Any slower handheld shutter speed begins to get motion blur and take the picture out of focus.
- Is the level of sensitivity of your camera
- With a high ISO you are able to take a photograph at night
- The component within your camera that can change sensitivity is called “image sensor”
M- when depth of field is important/manual control over aperture and shutter
A- aperture priority/
S- shutter priority
P- camera sets shutter speed and aperture
Camera Obscura
Camera Obscura could be in a small building with a rotating angled mirror at an angle on the roof, projecting an image of the landscape onto a surface inside. This was a way of better understanding of how cameras work.
Surrealistic Selfie
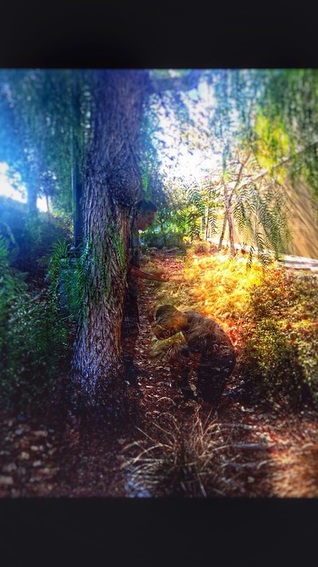
This image means about how I treat myself with how I handle things. How if I am ever feeling down I have learned to "pick myself up" which is basically me not needing somebody to cheer me up. So my image was created with the app Pixlr. This photo was taken with the help of my brother in vista next to the gym Crunch.
